Detached ADU Construction Guide for Homeowners
- Rowena Tulacz
- 7 days ago
- 8 min read

A detached ADU can turn an underused backyard into flexible living space, rental potential, or a private suite for family. It can also become a stressful project if the planning starts with floor plans instead of site conditions, local rules, and a realistic construction path.
A detached accessory dwelling unit is a separate residential structure on the same lot as a primary home. It usually includes its own entrance, kitchen, bathroom, sleeping area, and living space. Because it is a complete small home, the build process has many of the same steps as a new house, just at a smaller scale.
This guide walks through the major decisions in ADU construction, from early feasibility to final inspection, so the project starts with fewer surprises.
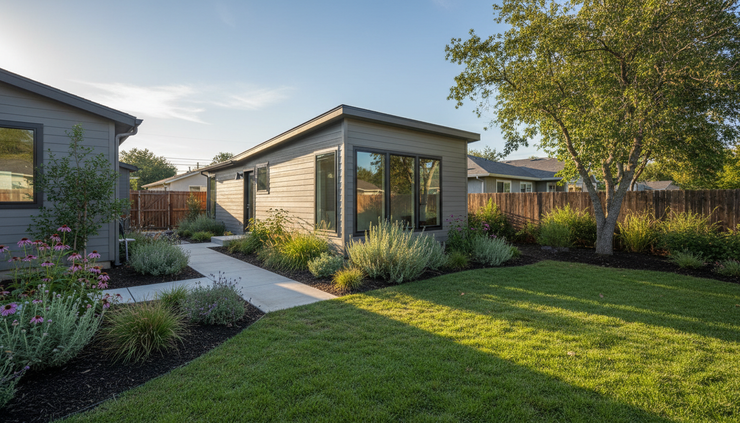
Start with the reason for building
The best ADU projects begin with a clear purpose. That purpose shapes the size, layout, budget, finishes, and even the placement on the lot.
Common reasons to build a detached ADU include:
Housing for aging parents or adult children
Long-term rental income
Guest space for visiting family
A private work, studio, or living area
Future downsizing while keeping the main home
A rental-focused ADU may need durable finishes, separate outdoor space, and privacy from the main house. A family suite may need wider doorways, fewer steps, and a layout that supports long-term comfort. A backyard studio with occasional guest use may prioritize light, storage, and flexible open space.
Clarity at the start prevents expensive changes later. Moving a wall during design is simple. Moving plumbing after framing is not.
Check whether the property can support a detached ADU
Before selecting finishes or sketching a dream layout, confirm that the property can legally and physically support a detached ADU.
Rules vary by state, county, and city. Some areas encourage ADUs, while others limit size, height, parking, setbacks, or short-term rental use. Homeowners should check local zoning and building rules early, especially if the property has easements, septic systems, steep slopes, protected trees, or historic district restrictions.
Key feasibility questions include:
Question | Why it matters |
How large can the ADU be? | Local rules may limit square footage or lot coverage. |
Where can it sit on the lot? | Setbacks, easements, and access paths affect placement. |
Can utilities be extended? | Water, sewer, gas, and electrical capacity can affect cost. |
Is parking required? | Some jurisdictions require dedicated parking, while others waive it. |
Are there rental limits? | Local rules may restrict short-term rentals or owner occupancy. |
A site survey can be helpful if property lines are unclear. Guessing at setbacks can lead to redesigns, permit delays, or worse, construction in the wrong place.
Choose the right ADU layout for the lot
Detached ADUs work best when the layout fits the property instead of fighting it. The size of the backyard matters, but so do sunlight, privacy, access, drainage, and the relationship between the main house and the new unit.
A compact studio may work well on a narrow lot. A one-bedroom ADU may need more careful planning for natural light and storage. A two-bedroom unit can support more occupants, but it also increases the need for parking, outdoor space, and utility capacity.
Think through these layout choices early:
Entry location
A side-yard entrance can create more privacy than a door facing the main house.
Window placement
Windows should bring in light without looking directly into neighboring homes or the main residence.
Outdoor space
A small patio, walkway, or planting buffer can make the ADU feel more complete.
Storage
Small homes need smart storage. Built-ins, tall cabinets, and attic access can make a major difference.
Mechanical space
Water heaters, electrical panels, and HVAC equipment need proper access and code-compliant placement.
A simple rectangle is often more cost-efficient than a complicated footprint. Corners, offsets, and unusual rooflines can add charm, but they can also add labor, engineering, and material costs.

Understand the main phases of detached ADU construction
A detached ADU is small, but it is still a full building project. The process includes design, engineering, permits, site work, foundation, framing, utilities, finishes, and inspections.
Most projects follow a path like this.
Feasibility and site review
This phase confirms what can be built. It may include zoning review, measuring setbacks, checking utility routes, and identifying site issues.
A good feasibility review looks at both code and practicality. For example, an ADU may technically fit in the backyard, but a large tree, poor drainage, or limited construction access could make the project harder.
Design and planning
The design phase turns the project goals into drawings. These documents show floor plans, elevations, structural details, utility connections, and energy requirements.
At this stage, homeowners make major decisions about size, layout, roof shape, exterior materials, and the basic finish level. The more complete the drawings are, the smoother the estimating and permitting process becomes.
Permitting
Permits protect safety, code compliance, and long-term property value. Permit requirements vary, but detached ADUs often need building, electrical, plumbing, mechanical, and sometimes grading approvals.
Plan review can take time. Responding quickly to comments helps keep the process moving. Some comments are simple clarifications. Others require design changes.
Site preparation
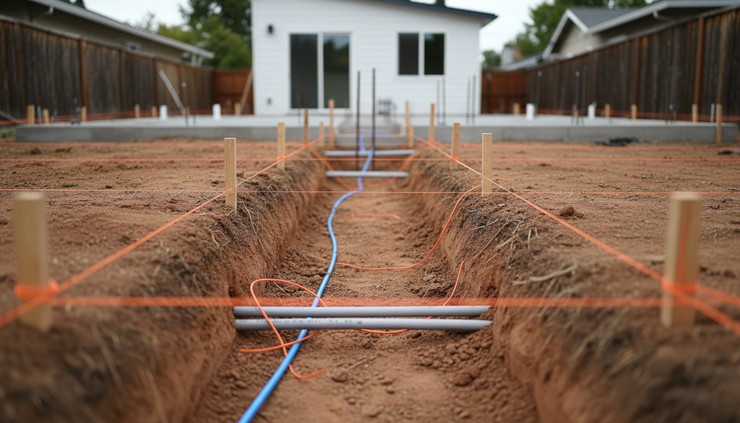
Site work may include demolition, clearing, grading, trenching for utilities, temporary fencing, erosion control, and access preparation.
This phase can uncover hidden conditions. Old pipes, tree roots, undocumented drainage, or unsuitable soil may require adjustments.
Foundation and framing
The foundation supports the ADU and must match soil conditions, structural design, and local code. Common options include slab-on-grade, raised foundation, and pier systems, depending on the site and design.
Framing gives the ADU its shape. Once framing begins, the project starts to feel real. This phase includes walls, roof structure, sheathing, windows, doors, and weatherproofing.
Mechanical, electrical, and plumbing work
This is where the ADU becomes functional. Electricians, plumbers, and HVAC contractors install systems behind the walls before insulation and drywall.
Good planning matters here. Outlet placement, lighting, kitchen ventilation, bathroom exhaust, and heating and cooling should match how the unit will be used.
Interior and exterior finishes
Finish work includes siding, roofing, gutters, flooring, cabinets, tile, paint, fixtures, appliances, trim, and hardware.
This is where budgets can drift. A small ADU still needs a kitchen, bathroom, doors, windows, and mechanical systems. Choosing durable, midrange materials often creates the best balance of cost, appearance, and maintenance.
Final inspections and closeout
Before the ADU can be occupied, inspectors must approve required systems and final construction. This may include building, electrical, plumbing, mechanical, energy, and fire-related inspections.
Keep records of warranties, plans, permits, and inspection approvals. These documents can help later with insurance, refinancing, resale, or repairs.
Plan utilities before construction starts
Utility planning can have a major effect on cost and schedule. A detached ADU often needs connections for water, sewer or septic, electricity, heating and cooling, and internet. Some projects may include gas, while others choose all-electric systems.
The distance between the main house and ADU matters. Longer utility runs usually mean more trenching, more materials, and more labor. Hardscape, mature landscaping, retaining walls, and driveways can also affect the route.
Electrical capacity deserves special attention. The main panel may need an upgrade if it cannot support the added load. Electric ranges, heat pumps, dryers, and water heaters all affect calculations.
Sewer connections can also be complex. Gravity may work if the ADU sits higher than the connection point. If not, a pump system may be needed. Septic properties need careful review because the existing system may not have capacity for another dwelling.
Build a realistic budget
Detached ADU budgets vary widely because every site is different. Size matters, but it is only one part of the total cost. A small ADU on a difficult site can cost more than a larger one on a simple, flat lot with easy utility access.
Major budget categories usually include:
Design and engineering
Permit and review fees
Site survey or soils report if needed
Demolition or clearing
Foundation
Framing and roofing
Windows and doors
Plumbing, electrical, and HVAC
Insulation and drywall
Interior finishes
Exterior siding and trim
Appliances and fixtures
Utility upgrades or trenching
Landscaping and drainage
Contingency funds
A contingency is not optional. Hidden site conditions, material changes, permit comments, and utility upgrades can affect the final cost. A reasonable reserve gives the project breathing room.
Homeowners should also think beyond construction cost. Insurance, property taxes, maintenance, furnishings, and rental management may affect the long-term financial picture.
Decide between custom, prefab, and standard plans
There is no single best way to build an ADU. The right approach depends on site conditions, budget, timeline, design goals, and local approval requirements.
Approach | Good fit | Watch for |
Custom build | Unique lots, specific needs, matching the main home | More design time and more decisions |
Standard plan | Faster design path and predictable layouts | May still need site-specific changes |
Prefab or modular | Controlled factory build and shorter on-site time | Access, crane space, utility work, and local approval still matter |
Prefab ADUs can be a good option, but they are not a shortcut around permits, foundations, utility connections, or inspections. A factory-built unit still needs a prepared site and code-compliant installation.
Custom construction gives more control over layout, windows, finishes, and the way the ADU fits the property. That flexibility is useful on lots with unusual slopes, privacy concerns, or tight setbacks.
Protect privacy and comfort
A detached ADU works best when both homes on the property feel comfortable. Privacy is not only about distance. It also comes from window placement, fencing, landscaping, entries, lighting, and sound control.
Small choices can improve daily life:
Place the ADU entrance away from the main home’s primary outdoor living area.
Use landscaping to soften sightlines between doors and windows.
Choose exterior lighting that improves safety without shining into bedrooms.
Add sound insulation where bedrooms, bathrooms, or mechanical equipment sit near shared areas.
Create a clear path from the street to the ADU.
Comfort also depends on good heating, cooling, ventilation, and natural light. Small spaces can overheat or feel stuffy if airflow is poor. Proper insulation, shaded windows, and efficient systems help the ADU feel like a real home, not an afterthought.
Avoid common ADU construction mistakes
Many ADU problems come from rushing the early planning stage. A careful start can prevent delays and budget stress.
Common mistakes include:
Designing before confirming zoning rules
Underestimating utility costs
Forgetting about drainage
Choosing a layout with poor storage
Ignoring construction access
Picking finishes before setting a total budget
Assuming a small building means a simple permit
Leaving neighbors surprised by construction activity
That last point matters more than many people expect. While neighbors usually cannot control a code-compliant project, clear communication can reduce tension. Letting nearby homeowners know about timing, fencing, noise, and access can make construction less stressful for everyone.
Work with the right construction team
An ADU requires coordination between design, permitting, site work, utilities, and building trades. The right team should understand small residential spaces, local permitting, and the details that make a detached unit comfortable.
Look for a builder who can explain:
What the local approval process usually involves
Which site conditions may affect cost
How utilities will reach the ADU
What is included in the estimate
How changes are handled
When inspections happen
How the schedule may shift during construction
A strong builder will not promise that every project is simple. Instead, they will identify risks early and explain how to manage them.
For more project-specific guidance, review Degan Builds’ page on detached ADU construction.
A detached ADU should be planned like a small home
A great ADU is not just a backyard structure. It is a code-compliant, comfortable, durable home that needs careful planning from the ground up.
Start with the purpose. Confirm the rules. Study the site. Plan utilities early. Build a budget that includes more than the visible structure. Then work with a team that understands how design choices, permits, and construction details connect.
When those pieces come together, a detached ADU can add useful space, long-term flexibility, and real value to a property.


Comments